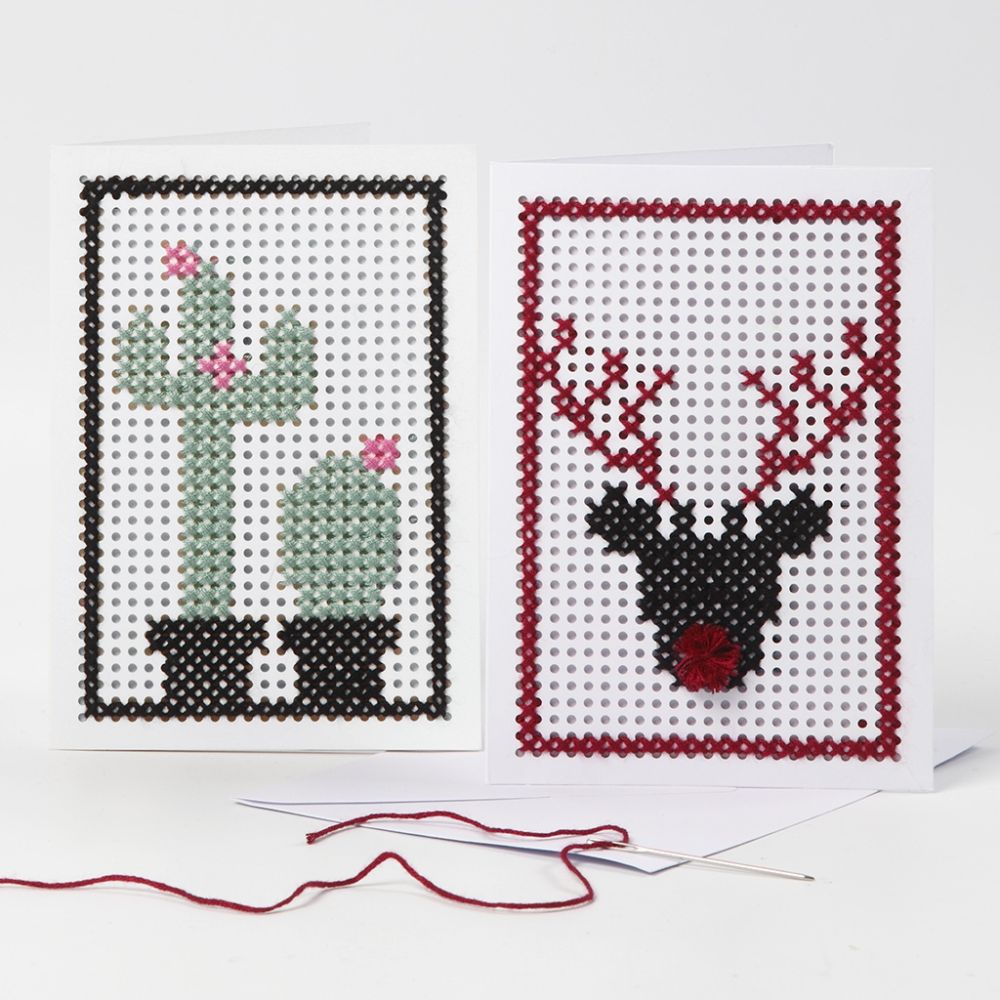
Deze wenskaarten zijn geborduurd met eenvoudige kruissteken aan de hand van een telpatroon. Voor de neus van het rendier is een pompon toegevoegd als speels accent.
Stitch cross-stitches along the edge.
Fasten the ends securely.
Continue stitching the cross-stitches according to the cactus pattern.
Apply double-sided adhesive tape to a piece of cardstock to cover the back of the embroidery, then press the two pieces firmly together.
Create the reindeer using the same steps as for the cactus, but wait to attach the cardstock backing until after you’ve sewn the pom-pom nose onto the front of the card.
Cut out a pom-pom maker using the template. Attach two strands of mercerised cotton yarn to it. Use these yarn ends both to assemble the pom-pom and to sew it onto the front of the greeting card.
Wrap mercerised cotton yarn around the pom-pom maker about 20 times. Then lift the two yarn strands from the notch, pull them tight, and secure them with a double knot.
Cut the yarn open.
Use the two strands of mercerised yarn to stitch the pom-pom onto the card.
Stitch the pom-pom in place to form the nose.
Tie a knot on the back and trim off the excess yarn.
A greeting card featuring an embroidered reindeer.
A greeting card decorated with an embroidered cactus.
Geen producten gekoppeld aan deze DIY.
Yes! Onze nieuwe webshop is live 🎉
Zie je een foutje, heb je vragen of valt er iets op?
App ons gerust op 06 3842 3241
We zijn superblij met je feedback,
helpen je meteen verder en fixen het zo snel mogelijk! 💜